The Emergency Food Trick Hiding in Your Kitchen Drawer
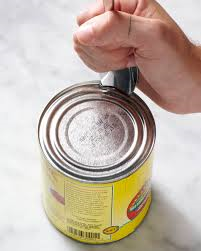
Being stuck with a sealed can and no can opener can quickly turn from a minor inconvenience into a stressful problem. This situation often arises unexpectedly—during a power outage, while camping, traveling in remote areas, or even at home when kitchen tools go missing or break. In moments like these, many people resort to risky improvisation, grabbing knives, scissors, or sharp objects that can easily cause injury. Fortunately, there is a safer and surprisingly effective solution that uses an item almost everyone has nearby: a solid metal spoon.
Although it may sound unusual, opening a can with a spoon is a practical technique when done correctly. It avoids the dangers associated with sharp blades, reduces the chance of deep cuts from jagged metal, and relies more on patience and control than brute force. With the right approach, a spoon can become a dependable alternative tool in situations where traditional openers are unavailable.
This guide explains why the spoon method works, walks through each step carefully, and offers helpful tips to keep the process safe and efficient.
Why a Spoon Can Open a Can
At first glance, it’s hard to imagine a spoon piercing a metal lid. The key lies in how pressure and friction interact with the thin aluminum or steel used in most cans. When the spoon’s tip is pressed and rubbed repeatedly against one spot, friction gradually wears the metal down. Once the surface weakens, a small puncture forms.
From there, the spoon can be used as a lever, working its way around the rim to lift the lid little by little. Unlike knives or scissors, a spoon’s rounded edges help limit sharp tears, lowering the risk of accidental cuts—especially important when first-aid supplies may not be available.
What You’ll Need
To use this method successfully, gather the following:
-
A strong metal spoon: Stainless steel works best. Avoid plastic or flimsy disposable spoons.
-
A stable, flat surface: A countertop, table, or cutting board prevents slipping.
-
A towel or non-slip mat (optional): Adds extra stability on smooth surfaces.
-
Patience: This process takes longer than a can opener, but rushing increases risk.
Step-by-Step Instructions
Step 1: Set Up Safely
Place the can on a firm, flat surface where it won’t roll. If available, put a towel or non-slip mat underneath to keep it steady.
Safety note: Do not hold the can in your hand while applying pressure. Stability is essential to avoid injury.
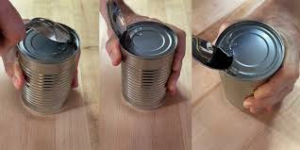
Step 2: Position the Spoon
Grip the spoon firmly in your dominant hand, similar to holding a pen. Angle the tip downward and place it against the inner rim of the lid—the seam where the top meets the can. This area is usually the thinnest and easiest to wear down.
Step 3: Apply Friction
Using consistent, moderate pressure, rub the spoon tip back and forth over the same spot. Let friction do the work.
-
Start gently rather than pressing hard.
-
Stay focused on one point instead of moving around.
-
Listen for faint scraping sounds or feel slight resistance changes—both signal progress.
After a few minutes, you should notice the metal beginning to weaken.
Step 4: Create the Opening
Once the lid punctures, carefully wiggle the spoon tip into the hole to widen it slightly. Move slowly and keep fingers away from the edge, as the metal may be sharp.
Step 5: Work Around the Lid
Insert the spoon into the opening and gently pry upward. Continue lifting the lid a small section at a time, moving along the rim.
-
Take breaks if needed.
-
Avoid forcing the spoon, which could cause slips or bending.
Patience ensures a safer, cleaner result.
Step 6: Remove the Lid
When the lid loosens enough, lift it off slowly. Set it aside carefully and dispose of it safely—edges are often sharp even when opened with a spoon.
Tips for Better Results
-
Use a heavier spoon for more durability.
-
Keep the can firmly stabilized for better control.
-
Gloves can add protection if the metal tears unevenly.
-
A slight angle toward the friction point improves effectiveness.
-
Short, repeated strokes wear down metal more efficiently.
Mistakes to Avoid
-
Using plastic or thin spoons—they will bend or snap.
-
Rushing the process, increasing the chance of slipping.
-
Holding the can while puncturing.
-
Skipping friction and trying to pry immediately.
When This Method Comes in Handy
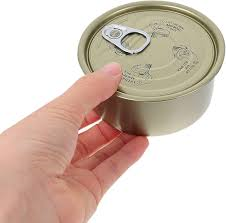
Power outages: Access canned food when electric openers don’t work.
Camping and hiking: A spoon doubles as an eating utensil and emergency tool.
Travel and dorm living: Useful in places with limited kitchen equipment.
Other Emergency Alternatives
Other items can open a can in a pinch, but they come with greater risk:
-
Butter knives (sharper edges)
-
Metal files
-
Concrete or flat rocks (messy and imprecise)
Compared to these, a spoon is cleaner, safer, and easier to control—especially indoors.
Safety Reminders
-
Keep fingers away from puncture points.
-
Let friction—not force—do the work.
-
Inspect the lid carefully before touching it.
-
Clean the spoon thoroughly before and after use.
Adding This Skill to an Emergency Kit
To stay prepared:
-
Include a sturdy stainless steel spoon.
-
Pack gloves or a small cutting board if possible.
-
Practice on an extra can so you’re confident when it matters.
Final Thoughts
Opening a can without a can opener may seem intimidating, but with a metal spoon, patience, and proper technique, it’s completely achievable. This method is:
-
Safe: Rounded edges reduce injury risk.
-
Effective: Works on most standard cans.
-
Accessible: Requires a common household item.
-
Versatile: Useful in emergencies, travel, or outdoor settings.
Next time a can opener is missing or unusable, remember that your spoon can do more than stir—it can unlock a meal when you need it most. With steady hands and a little time, an everyday utensil becomes a practical survival tool.
Key Points to Remember:
-
Always stabilize the can.
-
Use friction before prying.
-
Move slowly around the rim.
-
Avoid sharp edges.
-
Clean tools afterward.
This simple technique proves that everyday objects often hold unexpected value—sometimes all it takes is patience and a bit of know-how to turn a spoon into a lifesaver.